Configuring Asgardeo as an External IDP With Entgra MDM Using OIDC

Entgra MDM is a unified platform for developing, managing, and integrating Unified Endpoints (UEM), Enterprise Internet of Things (IoT), and Enterprise Mobility Management (EMM).
Asgardeo is an IDaaS developed by WSO2. It is a developer-friendly platform for managing user identities and accessing management seamlessly. This blog will explain the configurations that you need to do on Asgardeo and Entgra MDM.
What is an external IDP?
In a nutshell, an external identity provider is a service that manages and stores user identities. It provides authentication and authorization services to other applications and services. Although Entgra MDM has an in-built identity server that can leverage all identity and access management (IAM) related services, it also provides flexibility to developers as they can connect with external IDPs.
Configuring Asgardeo
First, create an Asgardeo account and the rest is easy. Use the following link to sign up.
Creating an organization
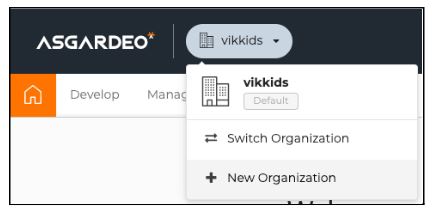
The concept of organization is something similar to the term tenant of WSO2 Identity Server. Create an organization by clicking on the dropdown menu on the top-left corner of the page.
This will prompt a simple form where we have to enter the name of the organization we are trying to create. (Note: this will allow only simple alphabetic characters and does not support other numerical, special characters or capital letters.)
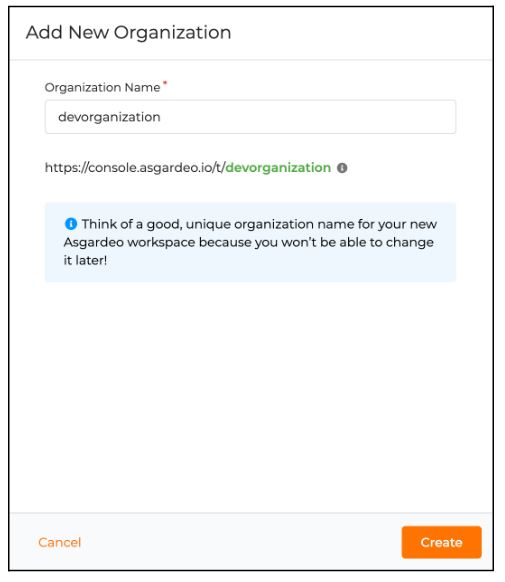
For the purposes of this blog, I’ve created an organization named “devorganization”. Once the organization is set, create a new OIDC application.
Creating a new OIDC application
Click “Develop” on the top menu of the Asgardeo console and it will take you to the following page.
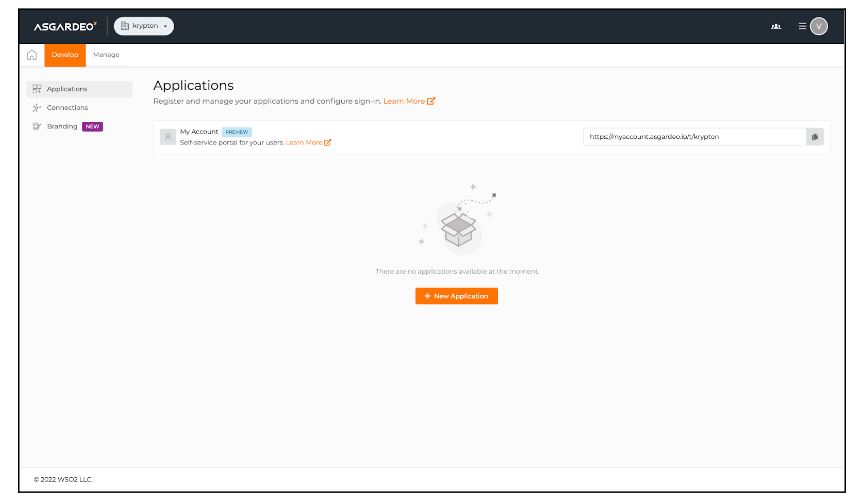
Then click on the “New Application” button and choose “Standard-based application”.
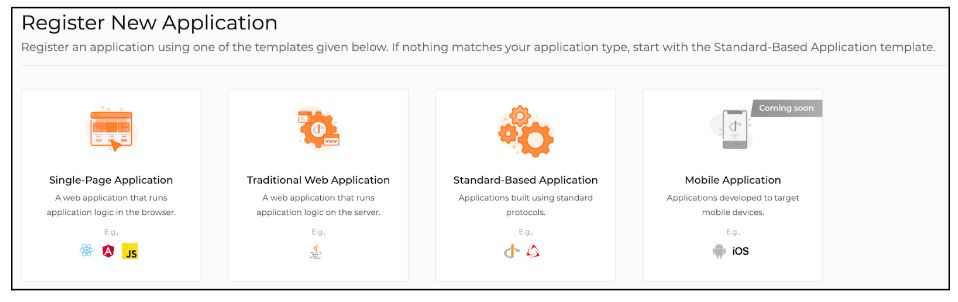
Give a name to the application and make sure to choose OIDC as the protocol. Check “Management application” if the application needs to access any management APIs of the organization. Finally, click on “Register” to create the application.

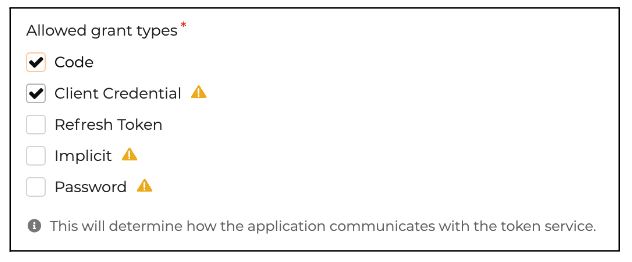
Inside the application settings, go to protocols and update the grant types as follows:
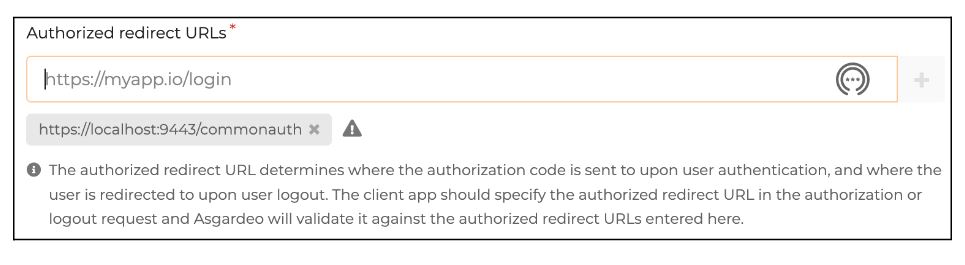
Add https://localhost:9443/commonauth as the Authorized redirect URL. This is the URL to which the Asgardeo will redirect after completing authentication.
Creating new custom user-attributes
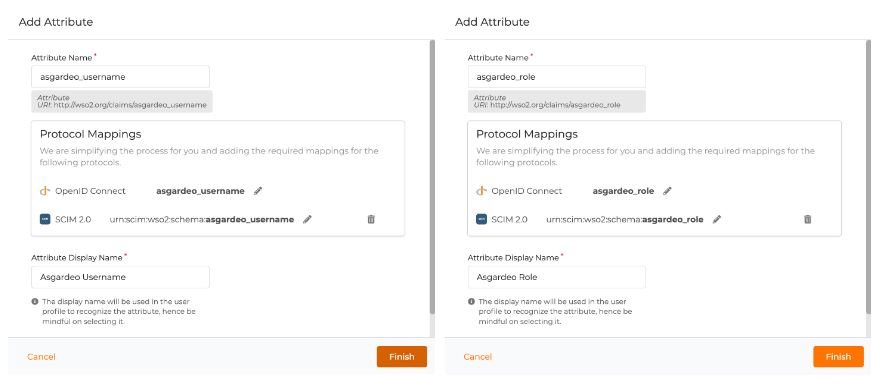
When using external IDPs, although the users will be stored inside the external IDP, they might have to be provisioned inside Entgra MDM using just-in-time provisioning (JIT). Map attributes such as username, role, etc. with the local attributes. To create a new attribute, click “Manage” on the top menu and then navigate to the attributes section.
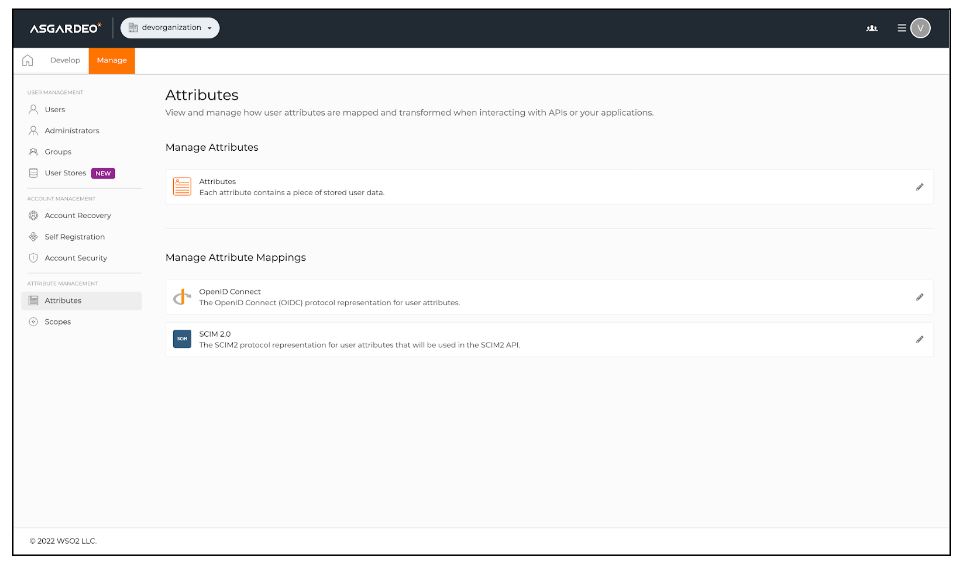
Click on “Attributes” and then proceed to “New attributes” to add a new attribute. Create a couple of attributes for username and role, namely the “asgardeo-username” and “asgardeo-role”.
After creating the attributes, it will redirect you to the configuration page of the attribute. Under this configuration, check the two configurations below and click on the update button to save the configurations.
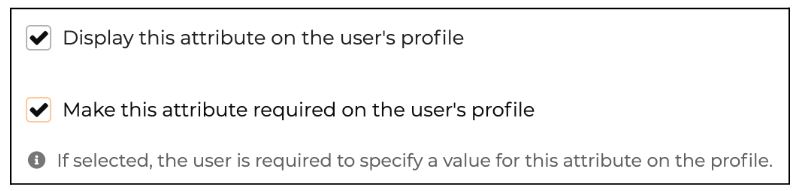
These two configuration will enable the display of these attributes in the user profile and make them mandatory.
Configuring the scopes
Configure the scopes to map the above attributes against “openid” scope, so that these attributes will pass during JIT provisioning. Under the “Manage” section, click on “Scopes”.
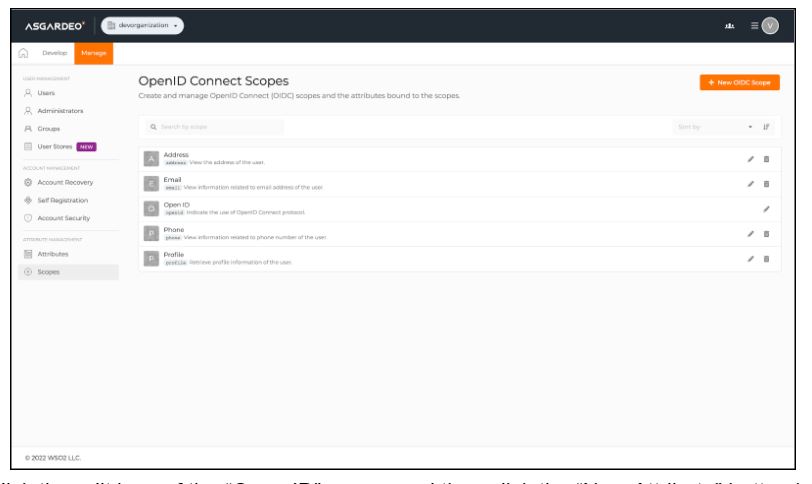
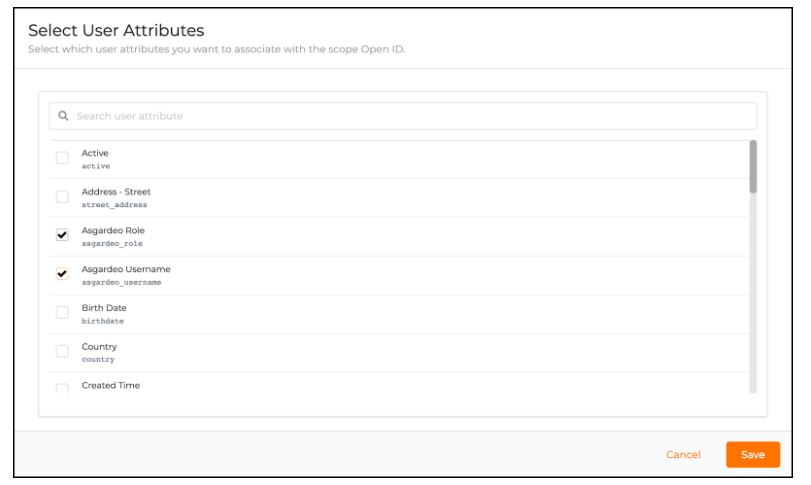
Click the edit icon of the “Open ID” scope and then click the “New Attribute” button inside it to add an attribute to this scope.
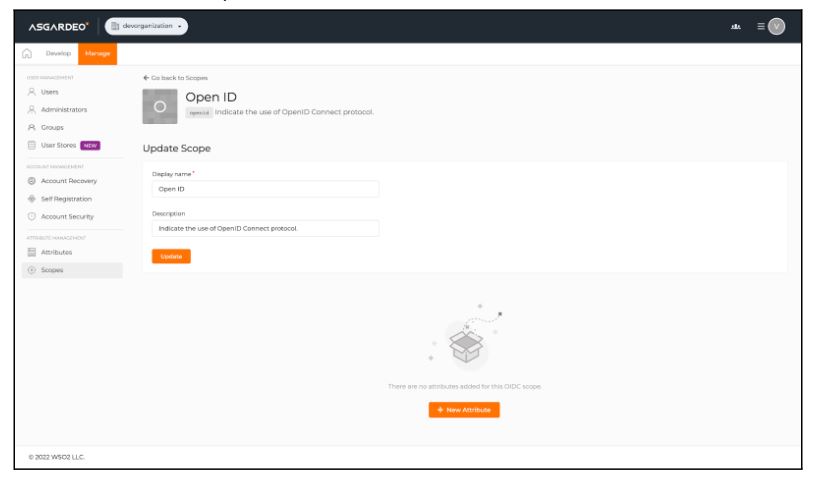
Check the “Asgardeo Username” and “Asgardeo Role” attributes and click on the “Save” button
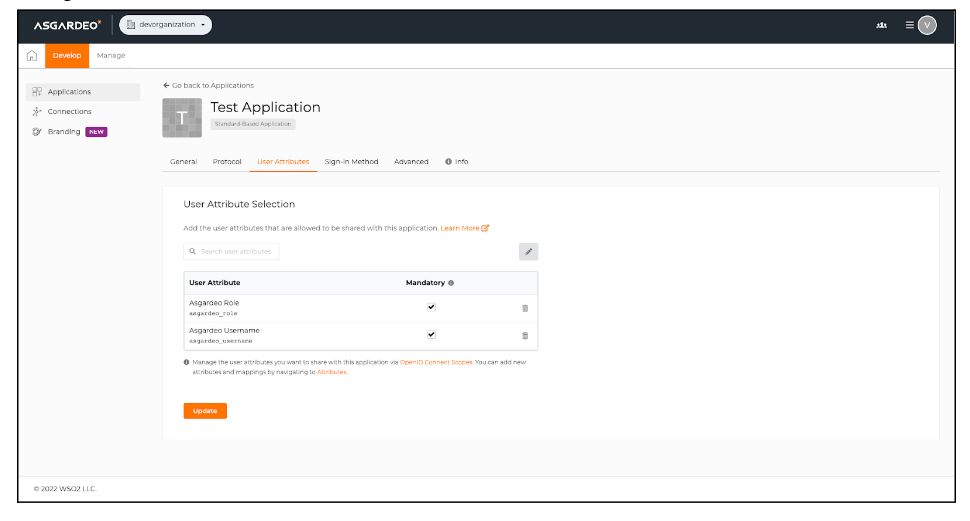
Go to the created application and edit the user attributes as follows and click “Update” to save these changes:
Creating a new user account
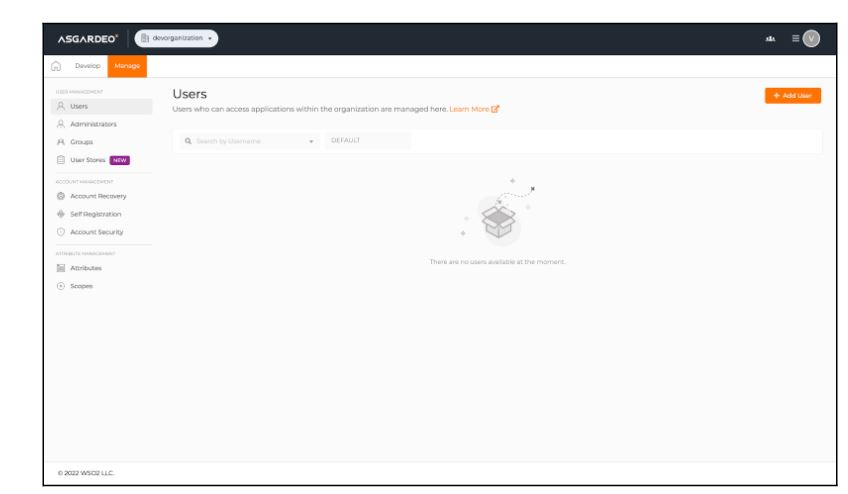
You must then create a new user account to test the Asgardeo authentication flow. Under the “Manager” section, click on the “Users” section to view the user management page. Click on the “Add User” button to create a new user.
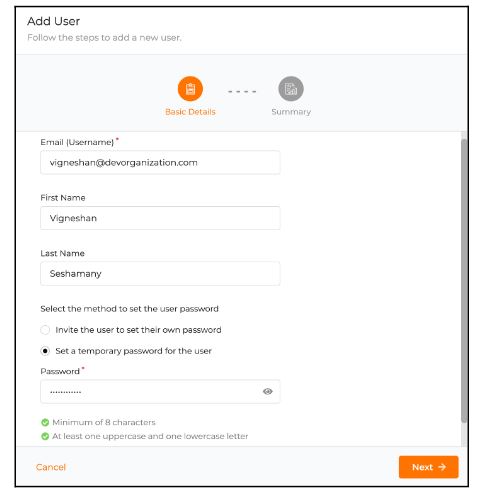
Create a new user by filling out the following fields along with a temporary password.
After creating the user account, go to the user’s profile and update the attributes that were created earlier and click on the “Update” button to save the changes.

Changing the subject claim of Asgardeo to username
By default, the User ID is set as the subject claim in Asgardeo. Entgra MDM will be looking for a username under the subject claim of the ID token. Therefore, we might have to update the subject claim of Asgardeo using their management APIs. Invoke the following APIs using the CURLs provided in the given order to change the subject claim.
Generate an access token using the client credentials of the application.
curl --location --request POST 'https://api.asgardeo.io/t/<organization_name>/oauth2/token' \
--header 'Content-Type: application/x-www-form-urlencoded' \
--data-urlencode 'grant_type=client_credentials' \
--data-urlencode 'client_id=<client_id>' \
--data-urlencode 'client_secret=<client_secret>' \
--data-urlencode 'scope=internal_application_mgt_view internal_application_mgt_update'
Search for all the applications under the organization and find the application-ID of the application you have created.
curl --location --request GET 'https://api.asgardeo.io/t/<organization_name>/api/server/v1/applications' \
--header 'Authorization: Bearer <access_token>'
Retrieve the application details using the above application-ID.
curl --location --request GET 'https://api.asgardeo.io/t/<organization_name>/api/server/v1/applications/<application_id>' \
--header 'Authorization: Bearer <access_token>'
Patch the application by changing the sub-claim to asgardeo_username. Change the values of the claim mappings and requested claims, based on the response received in step 3.
curl --location --request PATCH https://api.asgardeo.io/t/<organization_name>/api/server/v1/applications/<application_id>' \
--header 'Authorization: Bearer <access_token>' \
--header 'Content-Type: application/json' \
--data-raw '{
   "claimConfiguration": {
       "dialect": "LOCAL",
       "claimMappings": [
           {
               "applicationClaim": "http://wso2.org/claims/asgardeo_username",
               "localClaim": {
                   "uri": "http://wso2.org/claims/asgardeo_username"
               }
           },
           {
               "applicationClaim": "http://wso2.org/claims/asgardeo_role",
               "localClaim": {
                   "uri": "http://wso2.org/claims/asgardeo_role"
               }
           }
       ],
       "requestedClaims": [
           {
               "claim": {
                   "uri": "http://wso2.org/claims/asgardeo_username"
               },
               "mandatory": true
           },
           {
               "claim": {
                   "uri": "http://wso2.org/claims/asgardeo_username"
               },
               "mandatory": true
           }
       ],
       "subject": {
           "claim": {
               "uri": "http://wso2.org/claims/asgardeo_username"
           },
           "includeUserDomain": false,
           "includeTenantDomain": false,
           "useMappedLocalSubject": false
       }
   }
}'
Configuring Entgra MDM
So far we have completed the Asgardeo configuration successfully. Now let’s move on to configuration of Entgra MDM.
Creating a new user role
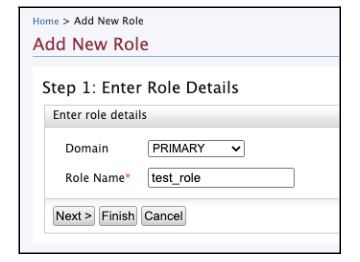
To explore various features of Entgra’s web applications, a user might need certain permissions. You have to create a new role for that and assign a few permissions. Inside the carbon console, click on “Add” under the “Users and Roles” section and then click on “Add New Role”. Let’s create a role called “test-role” and then click “Next” to add permissions.
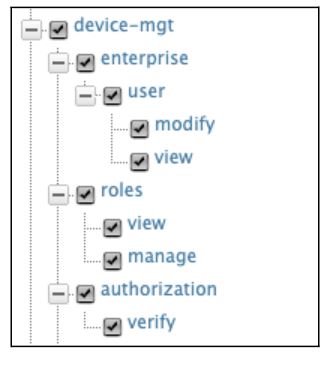
You can now see a permission tree with a list of permissions. Click on the “device-mgt” permission and it will choose the child permissions automatically.
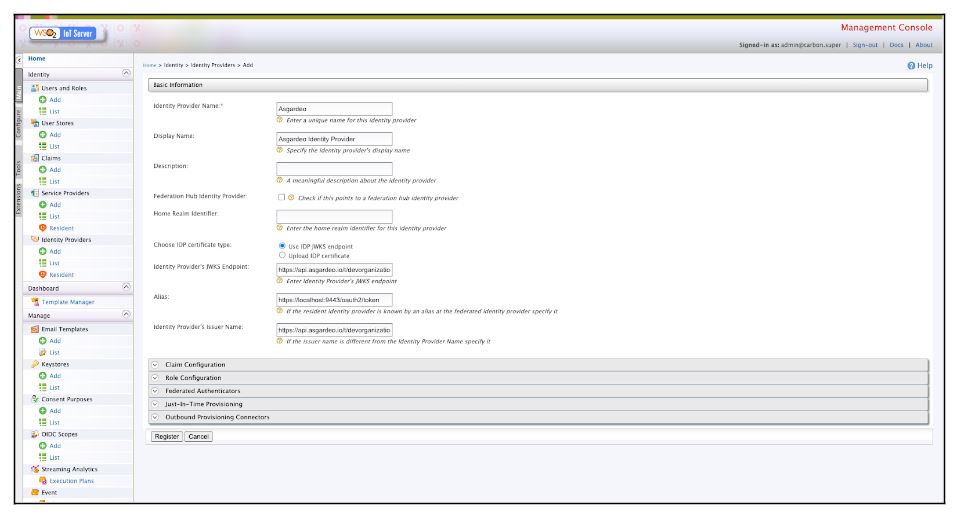
Adding a new Identity Provider
Log into the carbon console of Entgra MDM via https://localhost:9443/carbon and click on “Add” under the Identity Provider sections on the left vertical menu. You will see the following page and can configure the basic configuration as shown below:
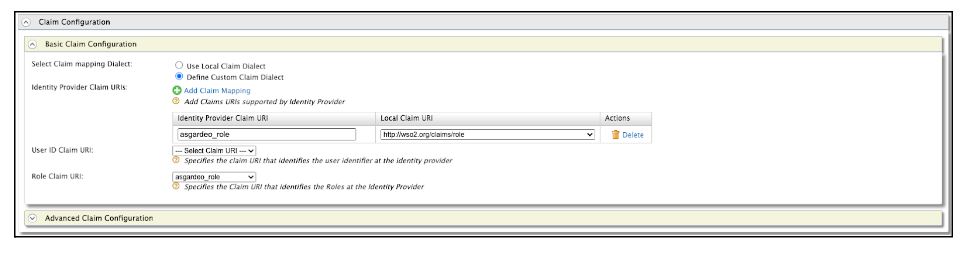
Configure the “Claim Configuration” as shown below. Here we are mapping the Asgardeo Role attribute with our internal role claim.
Configure the “Role Configuration” as shown below. We are trying to map the “Asgardeo Role” attribute value against an internal role named “Internal/devicemgt-user” that is already configured inside the product.

Configure the” Federated Authenticators” as shown below. Replace the client-id and client-secret with your Asgardeo application’s credentials.
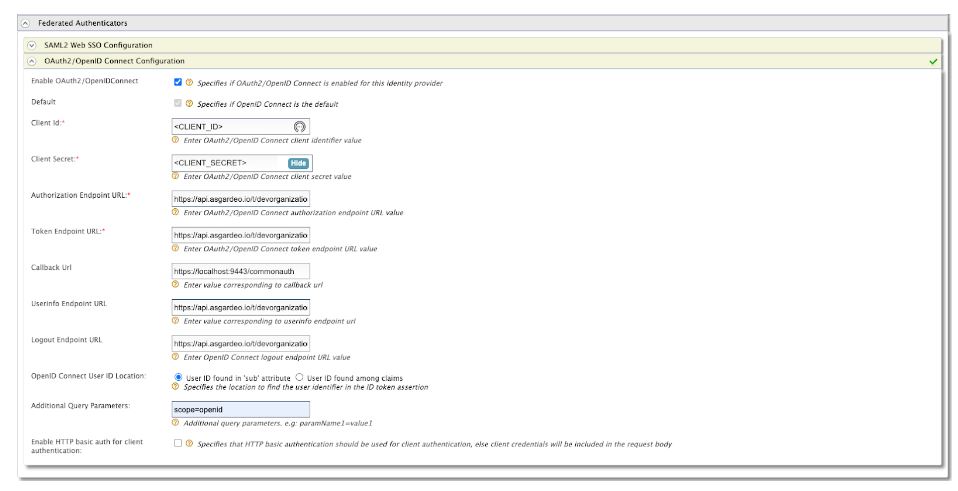
The endpoints are as follows:
Authorization Endpoint URL: https://api.asgardeo.io/t/devorganization/oauth2/authorize
Token Endpoint URL: https://api.asgardeo.io/t/devorganization/oauth2/token
Callback URL: https://localhost:9443/commonauth
Userinfo Endpoint URL: https://api.asgardeo.io/t/devorganization/oauth2/userinfo
Logout Endpoint URL: https://api.asgardeo.io/t/devorganization/oidc/logout
Additional Query Parameters: scope=openid
Configure the Just-in-Time provisioning to “Silent provisioning”.

Configuring Service Provider
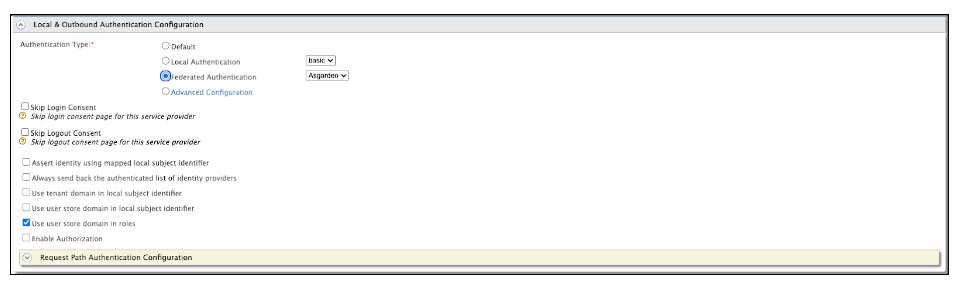
Entgra MDM comes with multiple web applications. Each of these web applications will have a service provider created inside the carbon console. To view the service providers, navigate to the Service Providers page. For this tutorial purpose, let’s try to configure Entgra’s Endpoint Management application with Asgardeo. Edit the Endpoint Management application’s service provider from the Service Providers page. If you cant see the service provider, try to log in to the endpoint management application at least once through the following URL: https://localhost:9443/endpoint-mgt.
Under the service provider, change the Authentication type to “Federated Authentication” and chose “Asgardeo” as the identity provider.
Voila! Now, we have successfully configured an Entgra MDM application, to SSO with Asgardeo IDaaS. Now you can log in to the https://localhost:9443/endpoint-mgt application using Asgardeo.
I hope that you found this blog useful. If you have any questions, do reach out to us here.